Introduction
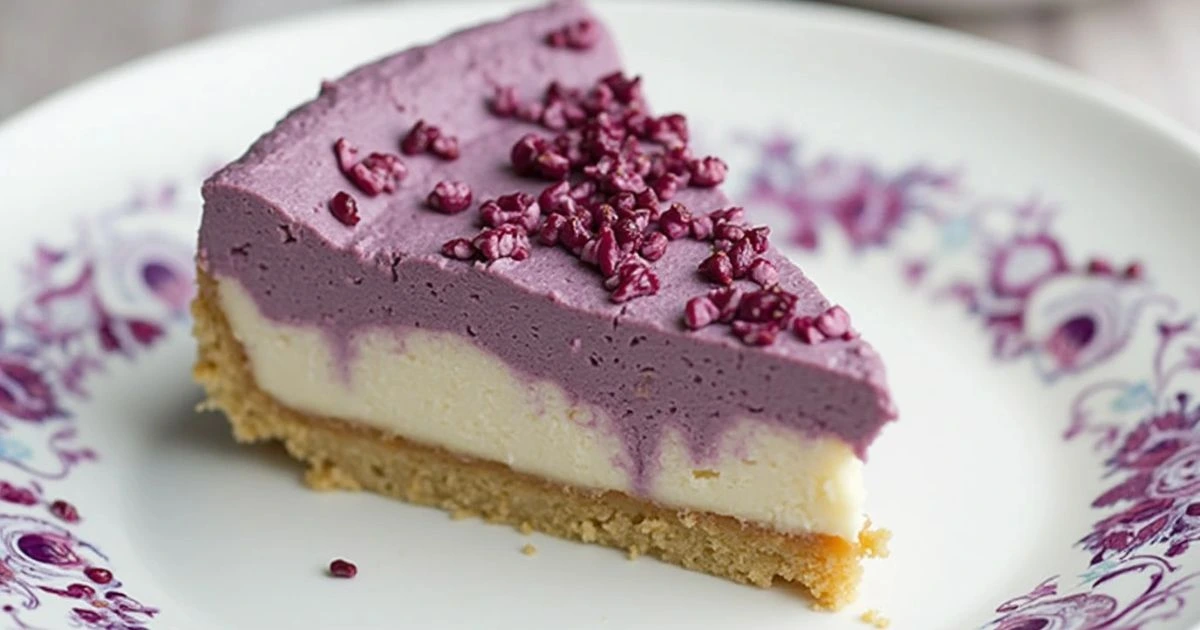
When it comes to desserts, few can match the rich, creamy goodness of a cheesecake. But have you ever tried one with a twist? Imagine a classic Basque cheesecake, known for its beautifully burnt top and custardy interior, combined with the vibrant flavor of ube, a purple yam that is a beloved staple in Filipino cuisine. This delightful fusion creates the Ube Basque Cheesecake, a dessert that not only tantalizes the taste buds but also makes a stunning centerpiece for any occasion.
In this article, you’ll explore the origins and characteristics of this unique dessert, discover the nutritional benefits of ube, and learn how to create your very own Ube Basque Cheesecake from scratch. Whether you’re a seasoned baker or a novice in the kitchen, this easy ube cheesecake recipe will guide you every step of the way. So, let’s dive into the creamy delight that is Ube Basque Cheesecake!
Table of Contents
What is Ube Basque Cheesecake?
A Fusion of Cultures
Ube Basque Cheesecake is a delectable blend of two distinct culinary traditions. On one hand, you have the Basque cheesecake, which originated from the Basque Country in Spain. This cheesecake is renowned for its smooth, creamy texture and its signature burnt top, achieved by baking at a high temperature. On the other hand, you have ube, a starchy purple yam that holds a special place in Filipino desserts.
The combination of these two elements creates a cheesecake that not only looks impressive but also offers a unique flavor experience. The subtle sweetness of ube pairs perfectly with the rich creaminess of the cheesecake, making every bite a delightful experience.
Characteristics of a Burnt Basque Cheesecake
The beauty of a burnt Basque cheesecake lies in its distinctive appearance and texture. Here are some key features that define this dessert:
- Creamy, Custard-Like Texture: Unlike traditional cheesecakes, which can be dense, the Basque version has a light, airy consistency that melts in your mouth.
- Distinctive Burnt Top: The top of the cheesecake is intentionally overbaked, giving it a dark, caramelized appearance that adds depth to the flavor.
- Soft and Airy Interior: The inside remains creamy and slightly wobbly, which enhances the overall experience.
When you take a slice of Ube Basque Cheesecake, you can expect a beautiful contrast between the caramelized top and the soft, luscious filling.
Why Ube? The Appeal of Purple Yam
Nutritional Benefits of Ube
Ube isn’t just a pretty face—it’s also packed with nutrients that can contribute to a healthy diet. Here are some of the benefits of incorporating ube into your desserts:
- Rich in Antioxidants: Ube contains antioxidants that help protect your cells from damage caused by free radicals.
- Good Source of Vitamins: It’s rich in vitamins A and C, which are essential for maintaining healthy skin and supporting your immune system.
- High in Fiber: The fiber content in ube aids digestion and can help you feel full longer, making it a more satisfying choice for dessert.
Adding ube to your Basque cheesecake not only enhances the flavor but also boosts its nutritional profile.
The Unique Flavor Profile
What makes ube truly special is its flavor. This purple yam has a sweet, nutty taste that’s unlike any other ingredient you might find in desserts. It brings a delightful depth to the cheesecake, balancing the richness of the cream cheese and sugar. The vibrant purple color also adds visual appeal, making your dessert as pleasing to the eyes as it is to the palate.
Easy Ube Cheesecake Recipe
Now that you’re familiar with the background of Ube Basque Cheesecake, let’s get to the fun part—making it yourself! This recipe is simple, making it ideal for both novice and seasoned bakers.
Ingredients Table
| Ingredients | Quantity |
|---|---|
| Cream cheese | 16 oz |
| Granulated sugar | 3/4 cup |
| Ube puree | 1 cup |
| Eggs | 3 large |
| Heavy cream | 1 cup |
| All-purpose flour | 1/4 cup |
| Vanilla extract | 1 tsp |
| Salt | 1/4 tsp |

Step-by-Step Instructions
Preparation
- Preheat the Oven: Begin by heating your oven to 400°F (200°C). This high temperature is crucial for achieving that characteristic burnt top.
Mixing
- Prepare the Cream Cheese Mixture: In a large mixing bowl, beat the cream cheese and granulated sugar together until smooth and creamy. Make sure there are no lumps.
- Add Ube Puree: Gradually incorporate the ube puree into the mixture. Blend until well combined, creating a beautiful purple hue.
- Incorporate the Eggs: Add the eggs individually, ensuring to mix well after each one. This step is essential for achieving a light, airy texture.
- Add Heavy Cream: Pour in the heavy cream and mix until just combined. Avoid overmixing, as this can lead to a denser cheesecake.
- Add Flour, Vanilla, and Salt: Gently fold in the all-purpose flour, vanilla extract, and salt. This will help stabilize the cheesecake without making it too dense.
Baking
- Prepare the Springform Pan: Grease a 9-inch springform pan with butter or cooking spray to ensure easy removal after baking.
- Pour the Mixture: Pour the cheesecake batter into the prepared springform pan, smoothing the top with a spatula.
- Bake: Put the pan in the preheated oven and bake for 35 to 40 minutes. The top should be dark brown, and the center should still have a slight jiggle when gently shaken.

Cooling
- Let it Cool: Once baked, remove the cheesecake from the oven and allow it to cool at room temperature. After about 30 minutes, transfer it to the refrigerator and chill for at least 4 hours or overnight for the best flavor.
Tips for the Perfect Cheesecake
- Use Room Temperature Ingredients: This ensures a smoother batter and helps incorporate air, resulting in a fluffier texture.
- Avoid Overmixing: Mix just until combined to keep the cheesecake light and airy.
- Consider a Water Bath: To prevent cracking and promote even baking, you can bake your cheesecake in a water bath. Simply wrap the outside of your springform pan with aluminum foil to prevent leaks, then place it in a larger baking dish filled with water.
Ube Desserts Variations
No-Bake Ube Cheesecake Options
If you’re looking for a quicker option or want to avoid the oven, a no-bake Ube Cheesecake is a fantastic alternative. Here’s a simple outline for creating one:
- Ingredients:
- 16 oz cream cheese
- 1 cup ube puree
- 3/4 cup powdered sugar
- 1 cup heavy cream
- 1 tsp vanilla extract
- 1 cup crushed graham crackers (for the crust)
- 1/4 cup melted butter
- Instructions:
- Prepare the crust by mixing the crushed graham crackers with melted butter and pressing it into a springform pan.
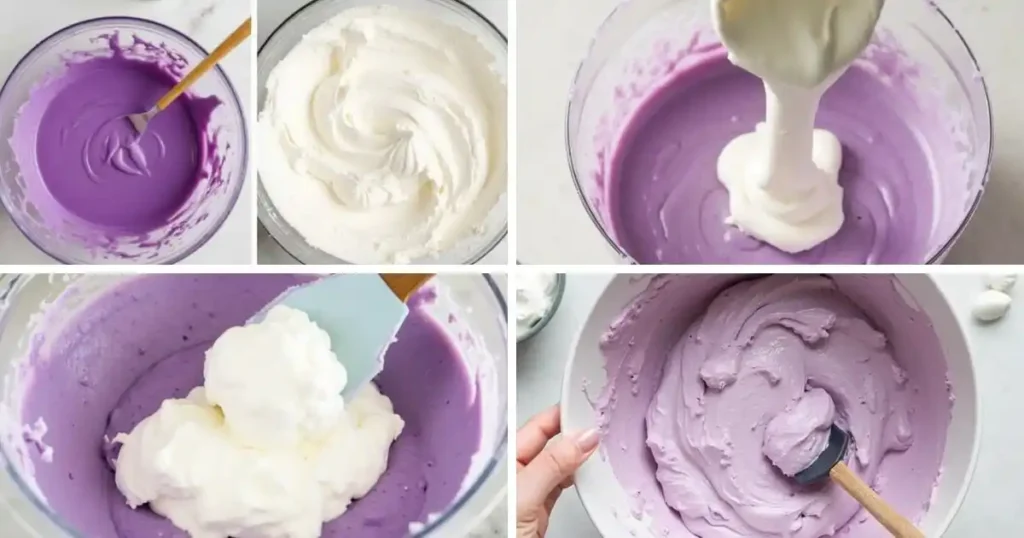
- In a mixing bowl, blend the cream cheese and powdered sugar until creamy and smooth. Gradually add ube puree and vanilla.
- In another bowl, whip the heavy cream until stiff peaks develop, then carefully fold it into the cream cheese mixture.
- Pour the mixture over the crust and refrigerate for at least 4 hours to set.
Traditional Basque Cheesecake vs. Ube Basque Cheesecake
When comparing traditional Basque cheesecake and Ube Basque cheesecake, here are some notable differences:
- Flavor: Traditional Basque cheesecake is rich and creamy, while the Ube version has a sweet, nutty flavor from the ube.
- Color: The Ube cheesecake offers a vibrant purple color, making it visually striking compared to the pale yellow of a traditional version.
- Texture: Both have the signature creamy texture, but the ube cheesecake can be slightly denser due to the addition of ube.
Serving and Storing Your Ube Basque Cheesecake
Presentation Ideas
When it comes to serving your Ube Basque Cheesecake, presentation can make all the difference. Here are some creative ideas:
- Garnish with Fresh Fruits: Top the cheesecake with sliced mangoes, strawberries, or blueberries for a burst of color.
- Add Whipped Cream: A dollop of freshly whipped cream can elevate the dessert and add a lightness to each bite.
- Serve with Coffee or Tea: Pairing your cheesecake with a cup of coffee or tea enhances the experience and provides a lovely contrast to the sweetness.
Storage Tips
To keep your Ube Basque Cheesecake fresh:
- Refrigeration: Store any leftovers in the refrigerator, where it can last for up to 5 days.
- Freezing: If you want to store it for a longer period, you can freeze individual slices. Seal them securely in plastic wrap and store them in an airtight container. Thaw in the refrigerator before serving.
savory asian desserts
FAQ Section
Common Questions About Ube Basque Cheesecake
- What is the main ingredient in Ube Basque Cheesecake?
- The star of this dessert is ube, which gives it a unique flavor and vibrant color.
- Can I make Ube Basque Cheesecake ahead of time?**
- Yes! In fact, it’s best enjoyed after chilling in the refrigerator for several hours or overnight.
- What can I substitute for ube puree?
- If you can’t find ube puree, you can try substituting with sweet potato puree, but the flavor will be different.
- Is Ube Basque Cheesecake gluten-free?
- You can make a gluten-free version by using gluten-free flour for the crust and filling.
Conclusion:
Embrace the Flavor of Ube Basque Cheesecake
Ube Basque Cheesecake is more than just a dessert; it’s an experience that brings together the rich culinary traditions of the Basque Country and the Philippines. With its creamy texture, unique flavor, and stunning appearance, this dessert is sure to impress at any gathering. Whether you’re making it for a special occasion or simply to satisfy your sweet tooth, you’ll be delighted by the combination of flavors and textures in every bite.
Now that you have all the tools to create your own Ube Basque Cheesecake, it’s time to get baking! Share your creations with family and friends, and watch as they marvel at the beauty and taste of this exquisite dessert. Don’t forget to let us know how your cheesecake turned out—your feedback and stories inspire others in their culinary adventures!
Have you tried making your own Ube Basque Cheesecake? Share your experience in the comments below or tag us on social media with your beautiful dessert photos! Happy baking!


1 thought on “Ube Basque Cheesecake: Creamy Delight with a Filipino Twist”