
Introduction:
A Sweet Tradition Without the Stress
The holiday season is a time for joy, togetherness, and of course, delicious desserts. But let’s be honest—oven space is often in high demand during this bustling time of year. That’s where the Icebox Yule Log comes to the rescue. This delightful no-bake treat brings elegance and simplicity to your holiday table, sparing you from hours in the kitchen. With its rich layers and festive presentation, it’s a dessert that will leave your family and guests impressed, and you stress-free.
Table of Contents
What is an Icebox Yule Log?
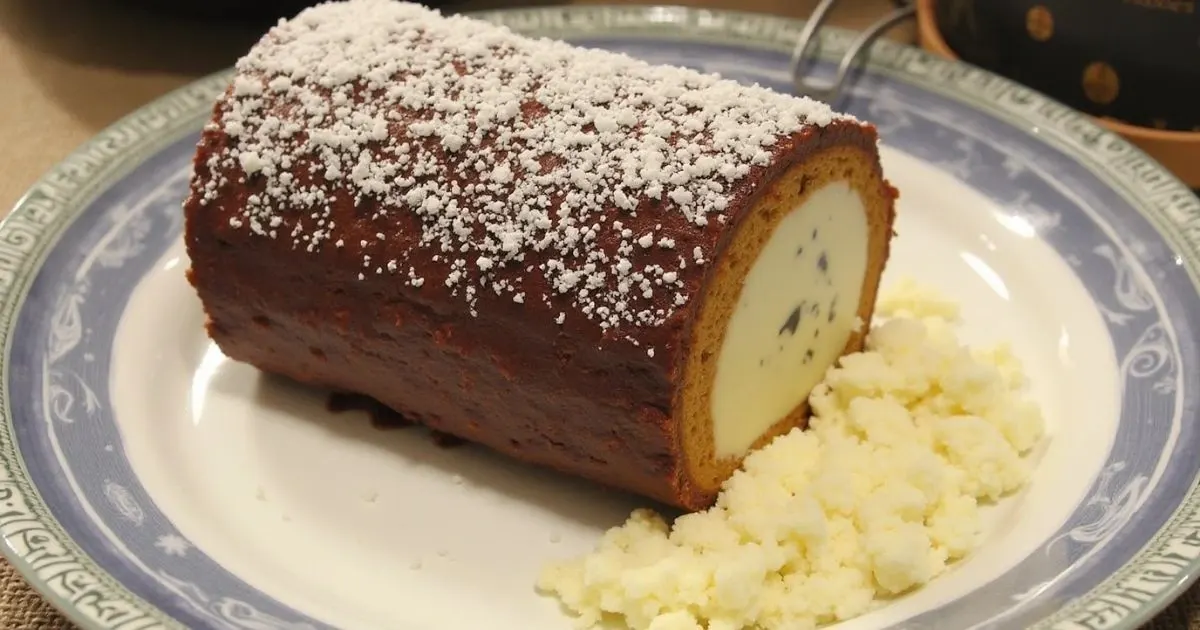
At its core, an Icebox Yule Log is a modern twist on the classic holiday dessert. Traditionally, a Yule log symbolizes the warmth of the season, but this version swaps out the heavy cake and frosting for light and luscious layers of cookies and cream. By refrigerating rather than baking, the dessert transforms into a melt-in-your-mouth masterpiece. It’s perfect for when you want to deliver holiday magic without breaking a sweat.
Why Choose a No-Bake Dessert for the Holidays?
Convenience at Its Best
The holidays are busy enough without juggling multiple dishes in the oven. A no-bake dessert like the Icebox Yule Log frees up valuable time and kitchen space.
Versatility for Creative Touches
You can easily adapt this recipe to suit your tastes or dietary preferences. Whether you’re adding peppermint for a festive twist or opting for gluten-free cookies, the possibilities are endless.
Family Bonding Opportunity
This recipe is so simple that even kids can join in the fun. Let them stack cookies or sprinkle decorations—it’s a wonderful way to create memories together.
Ingredients for the Icebox Yule Log
Essential Components
To get started, you’ll need a handful of basic ingredients. These items are easy to find and deliver a decadent result.
| Ingredient | Quantity | Notes |
|---|---|---|
| Chocolate wafers | 1 package (approx. 9 oz) | Thin cookies work best. |
| Whipped cream | 3 cups | Use stabilized whipped cream for better structure. |
| Chocolate ganache | 1 cup | Optional, for a glossy finish. |
| Festive decorations | As desired | Try powdered sugar, berries, or edible glitter. |
How to Make the Perfect This Recipe
Step-by-Step Instructions
Creating an Icebox Yule Log is a straightforward process. Follow these steps to craft a dessert that’s both stunning and satisfying.
- Prepare Your Ingredients
- Chill your whipped cream to ensure it holds its shape.
- Have all your decorations ready for easy assembly.
- Assemble the Log
- Spread a dollop of whipped cream onto a chocolate wafer.
- Stack another wafer on top and repeat until you’ve formed a long log.
- Wrap and Chill
- Gently wrap the log in plastic wrap, ensuring it’s snug but not overly tight.
- Place it in the fridge for at least four hours or overnight. This step allows the cookies to soften and meld with the cream.
- Decorate with Flair
- Remove the chilled log from the fridge and spread a layer of chocolate ganache for a polished look.
- Add festive touches like powdered sugar or edible decorations.
Tips for Success
- Use a serrated knife to slice the log cleanly.
- Keep your whipped cream chilled throughout the process to prevent melting.
- Be generous with decorations—they add the perfect festive touch!
Variations to Try
Classic Vanilla Icebox Log
Swap the chocolate wafers for vanilla ones and pair them with a vanilla-flavored whipped cream.
Peppermint Wonderland
Crush candy canes and fold them into the whipped cream for a refreshing twist.
Gluten-Free Delight
Opt for gluten-free cookies to make this dessert accessible to everyone at the table.
How to Serve and Store Your Icebox Yule Log
Serving Tips
- Slice diagonally to showcase the beautiful layers.
- Pair each slice with a scoop of vanilla ice cream or a drizzle of caramel sauce for extra indulgence.
Storing Leftovers
- Refrigerate any leftovers in an airtight container. The dessert will stay fresh for up to three days.
- Avoid freezing, as this can compromise the texture of the whipped cream.

Nutritional Information and Health Benefits of Icebox Yule Log
Nutritional Breakdown
Here’s a general estimation of the nutritional content per serving (based on 8 servings) of a standard this recipe:
| Nutrient | Amount Per Serving | Notes |
|---|---|---|
| Calories | ~250-300 kcal | Varies based on ingredients. |
| Total Fat | ~18g | Includes fats from whipped cream. |
| Saturated Fat | ~10g | Mainly from cream and chocolate. |
| Carbohydrates | ~25g | Mostly from cookies and chocolate. |
| Sugar | ~15g | Depends on added decorations. |
| Protein | ~3g | From whipped cream and wafers. |
| Fiber | ~1g | Minimal, from cookies or add-ons like berries. |
Note: Nutritional values will vary depending on specific brands and ingredient substitutions.
Health Benefits
- Provides Quick Energy
- The carbohydrates and sugars in the dessert give a quick energy boost, making it an ideal indulgence during the festive season.
- Rich in Antioxidants
- If you use dark chocolate for the ganache, it’s a great source of antioxidants, which help fight free radicals in the body.
- Boosts Mood
- Chocolate contains compounds like serotonin and phenylethylamine, which can elevate your mood and reduce stress.
- Customizable for Dietary Needs
- By swapping traditional ingredients for low-sugar, low-fat, or gluten-free options, you can create a dessert that aligns with your dietary preferences without compromising flavor.
Tips for Making It Healthier
- Use Low-Sugar Alternatives: Opt for sugar-free chocolate wafers or whipped cream to reduce the sugar content.
- Choose Dark Chocolate: Dark chocolate with a high cocoa percentage is lower in sugar and higher in beneficial compounds.
- Add Nutrient-Rich Ingredients: Incorporate fresh fruits like raspberries or strawberries for added fiber, vitamins, and a pop of natural sweetness.
- Use Greek Yogurt: Replace whipped cream with lightly sweetened Greek yogurt for a high-protein, lower-fat option.
Indulging in an Icebox Yule Log doesn’t have to mean sacrificing your health goals. With a few mindful tweaks, you can enjoy this holiday dessert while keeping it aligned with your nutritional preferences!
Conclusion
The Icebox Yule Log is more than just a dessert—it’s a holiday tradition waiting to happen. Its no-bake simplicity makes it accessible for even the busiest of hosts, while its elegance ensures it will be the star of any dessert table. Whether you’re a seasoned baker or a kitchen novice, this recipe is sure to delight your taste buds and warm your holiday celebrations.
Ready to try your hand at this festive treat? Share your Icebox Yule Log creations with us in the comments below! Don’t forget to add your personal touches and spread the holiday cheer by sharing this recipe with friends and family.